 Sichere Zahlungen
 Kostenloser Versand ab 85 € (DE, AT, FR)

Roller carriage conversion kit for the Bosch GTS 635-216 rip fence
Assembly instructions
Inaccurate parallel attack? Not with us! Our specially developed roller carriage for the Bosch GTS 635-216 takes your saw table to a new level. 9 high-quality ball bearings
The stop action runs smoothly and with absolutely no play – for clean,
Repeatable cuts and maximum control on every project.
Light
- 3mm Allen key
- Open-end wrench/socket 10mm
- PH2 and PH3 screwdrivers
- Pin punch and hammer
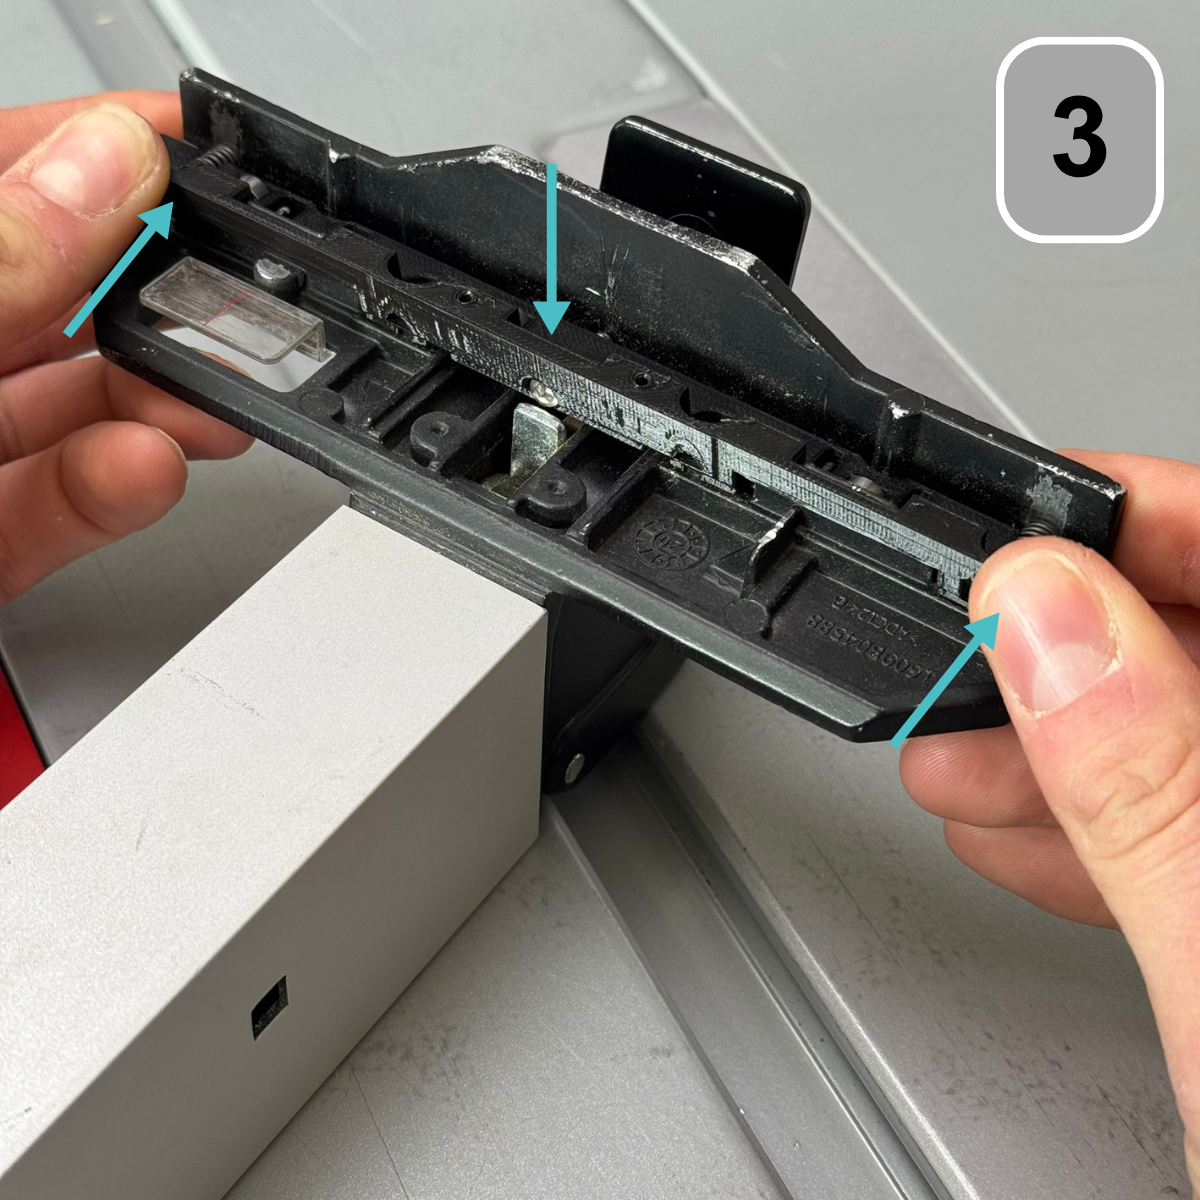
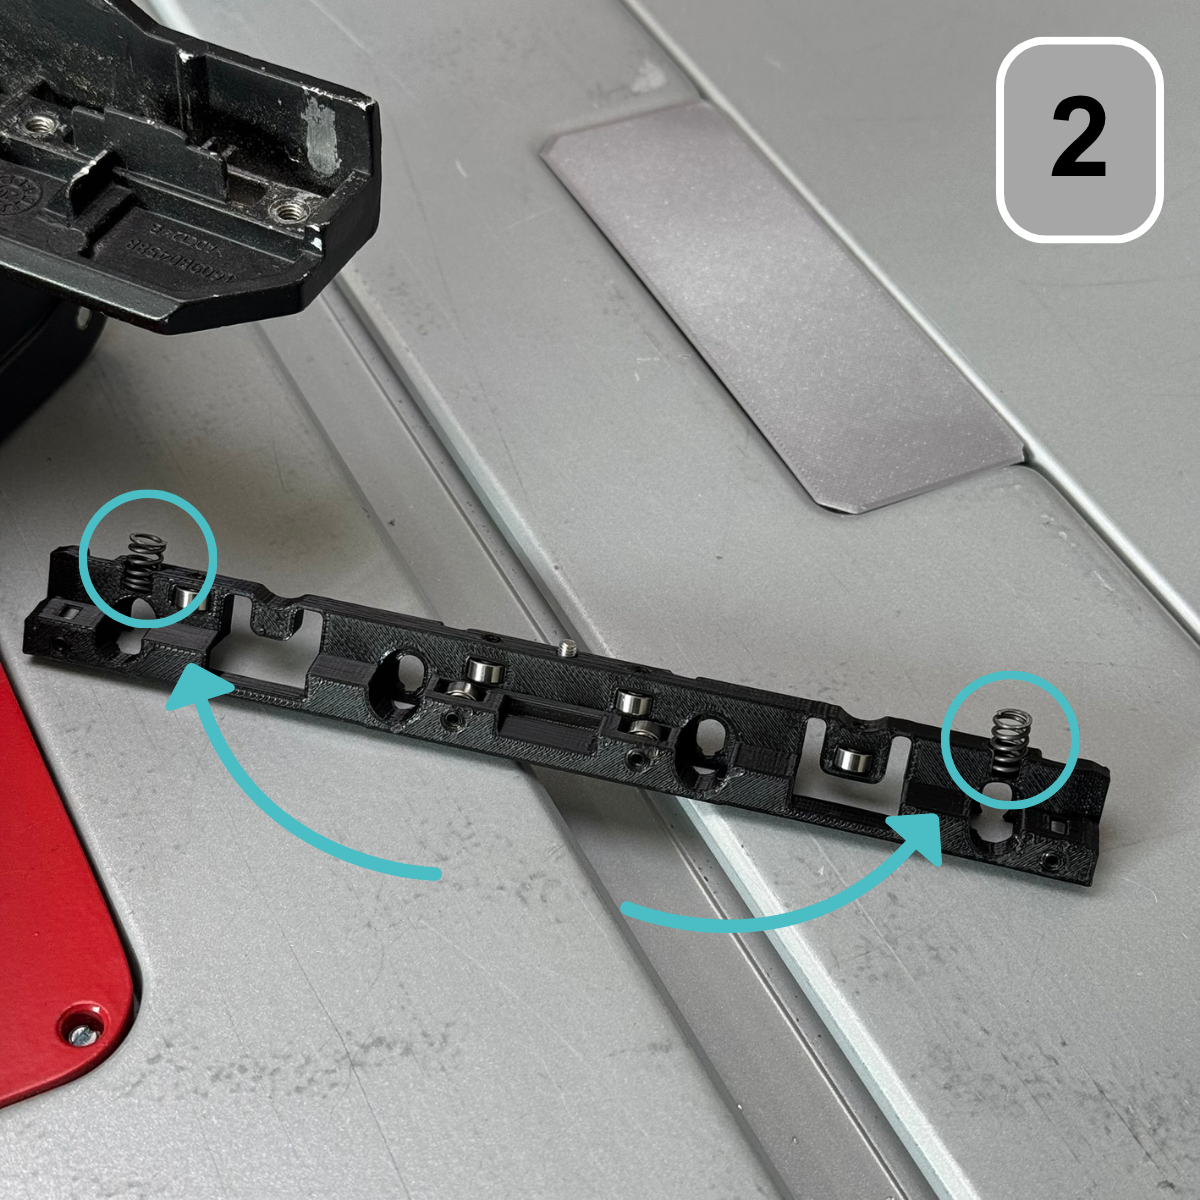
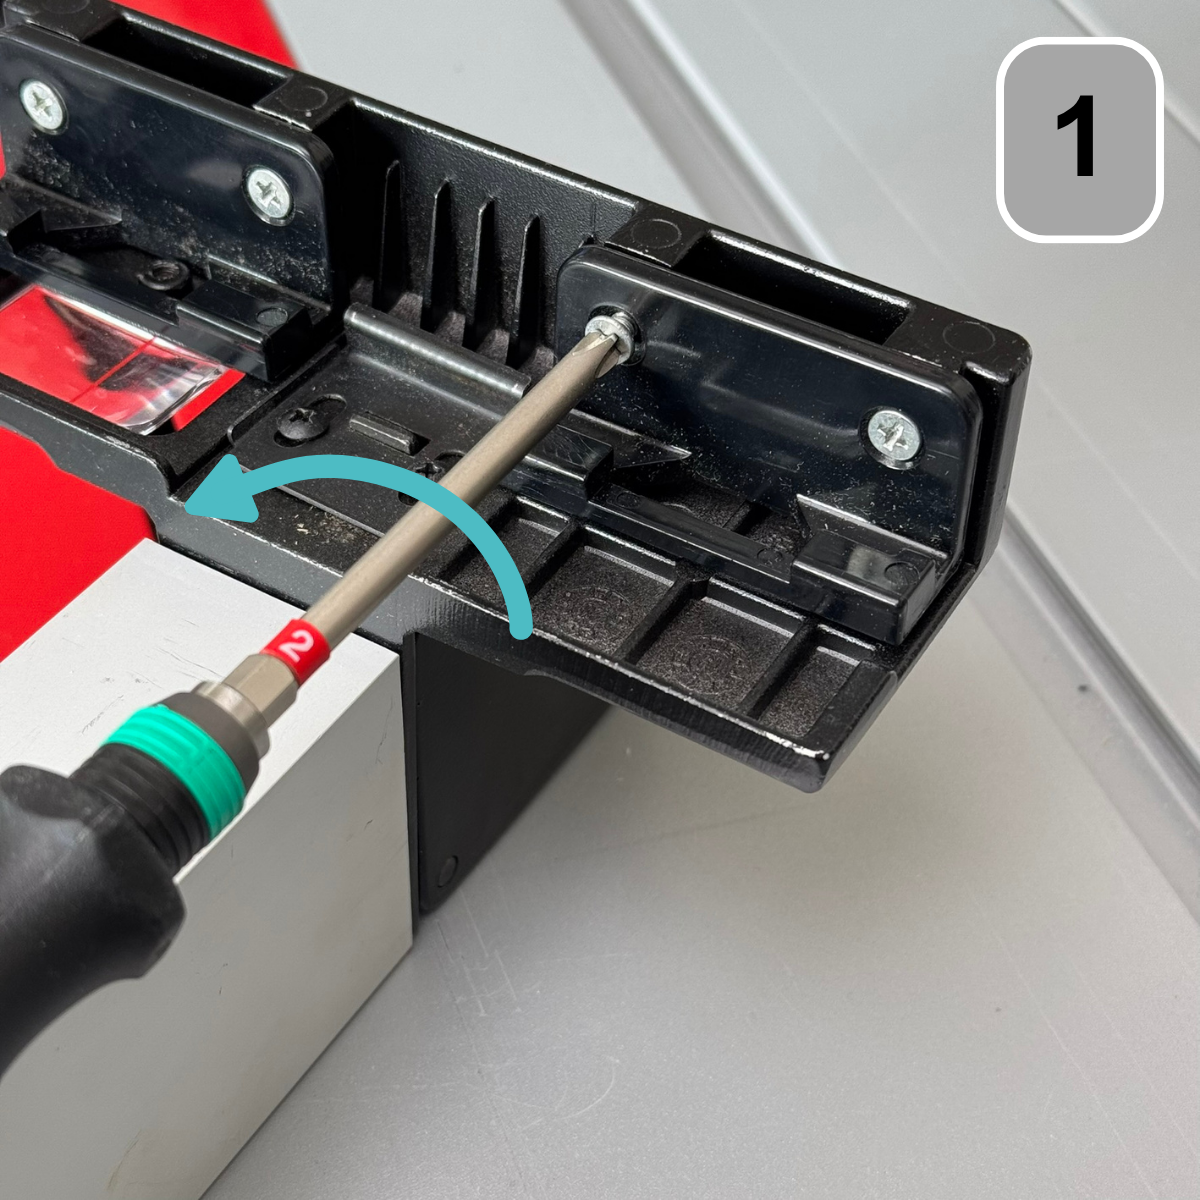
Step 1: Insert the roller carriage in the rip fence
Remove the glide shoes using a PH2 screwdriver.
Step 3: Insert the roller carriage in the rip fence
Insert the roller carriage into the parallel fence in which a light
pressure is exerted against the springs and then downwards into position
insert.
Step 3: Dismantling the saw blade cover
Remove the five screws from the black cover and take out the cover.
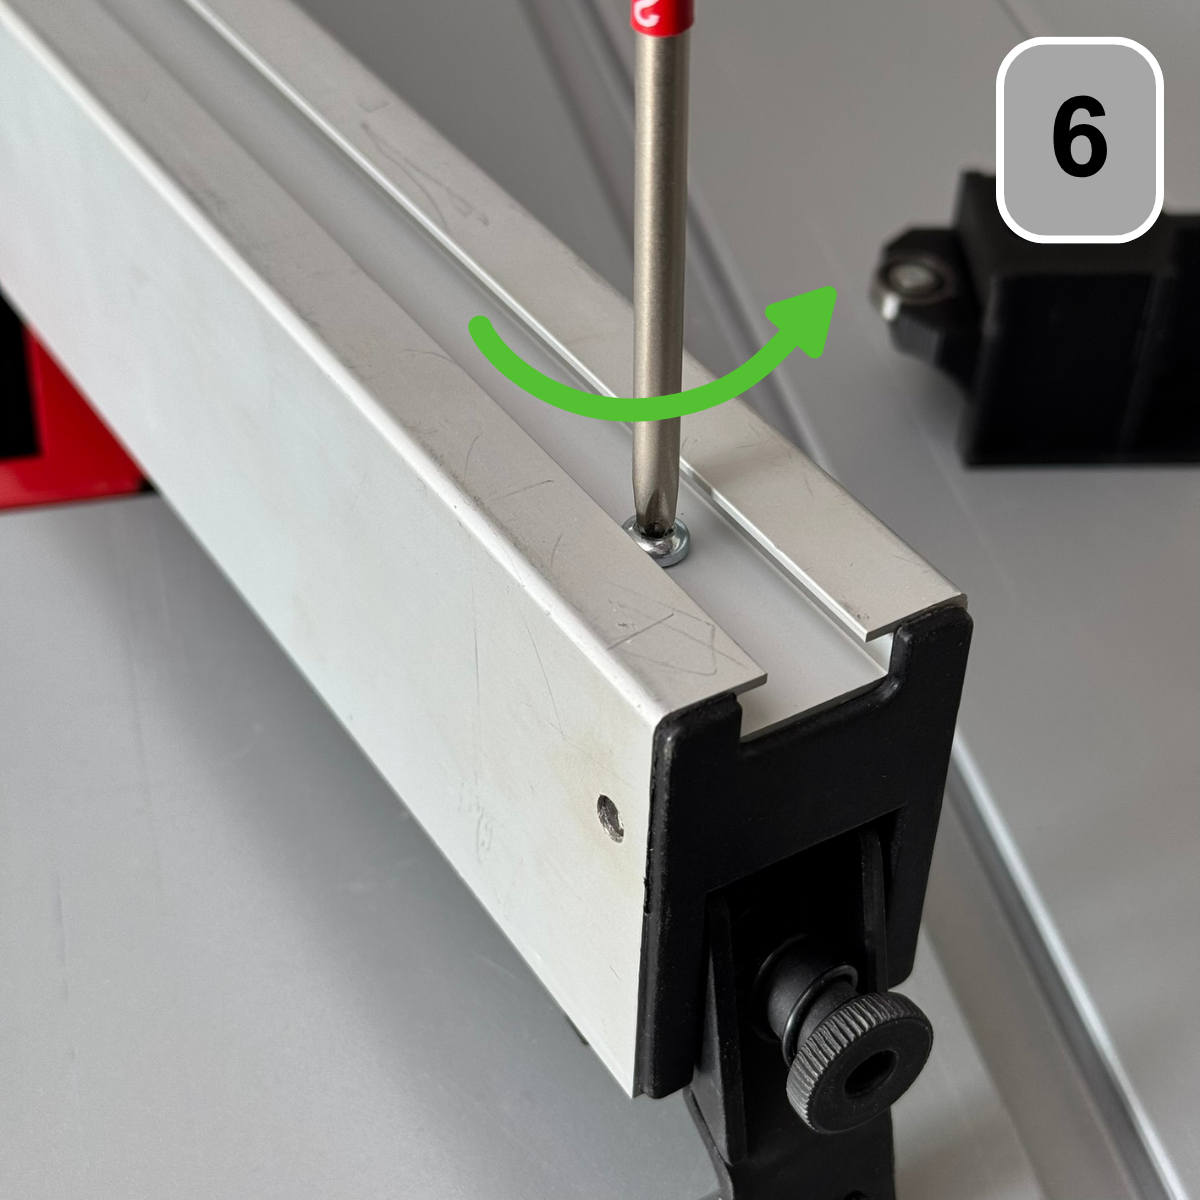
Step 4: Adjust the roller carriage
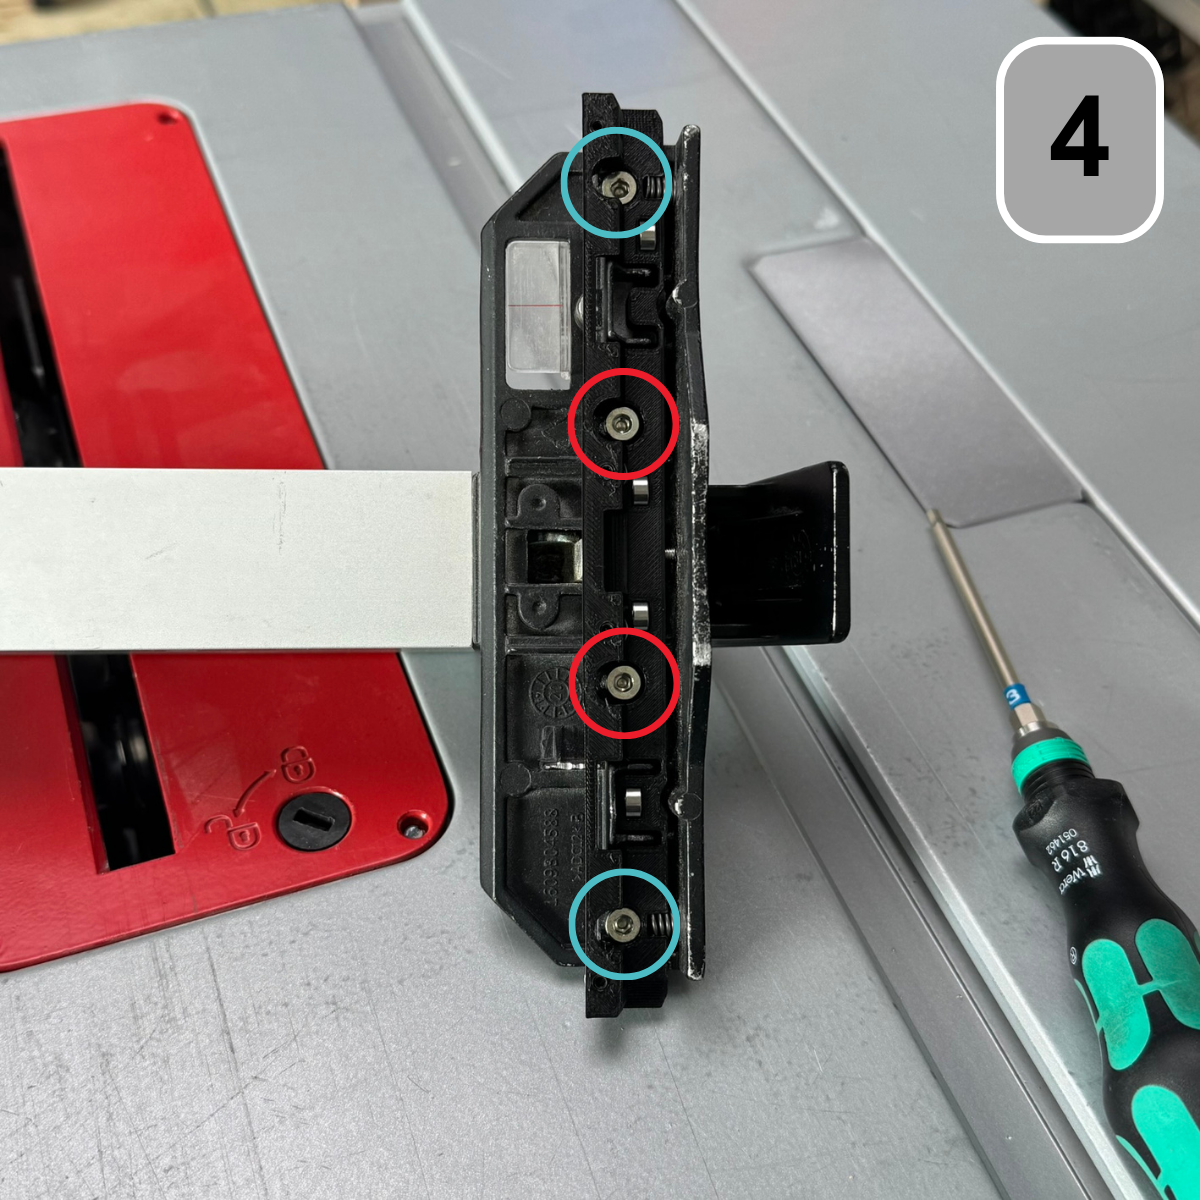
Mount the roller carriage using the supplied screws.
It is important that the two screws located in the middle (red)
(marked) should not be tightened, but only enough so that the head
the screw rests on the roller carriage. The outer screws
can be tightened securely.
Do not make any further adjustments to the roller carriage for now.
Step 5: Assembling followers
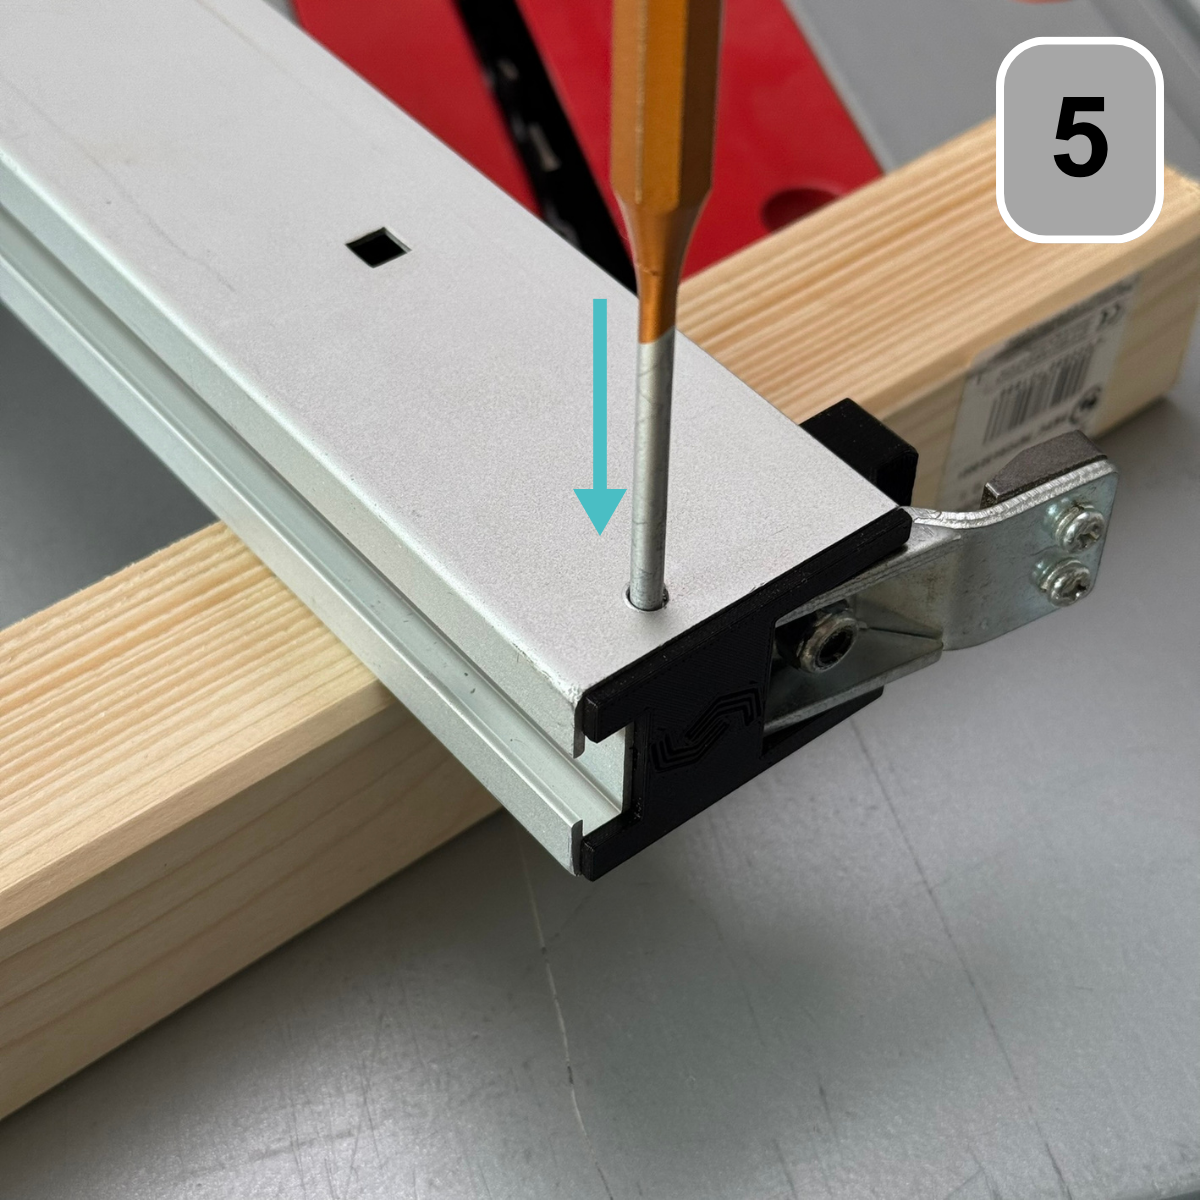
Turn the parallel fence over. Use the pin punch to remove the clamping lever axle.
Step 6: Assembling followers
Using the PH3 screwdriver, the thread-cutting screw on the top of the parallel stop must be removed.
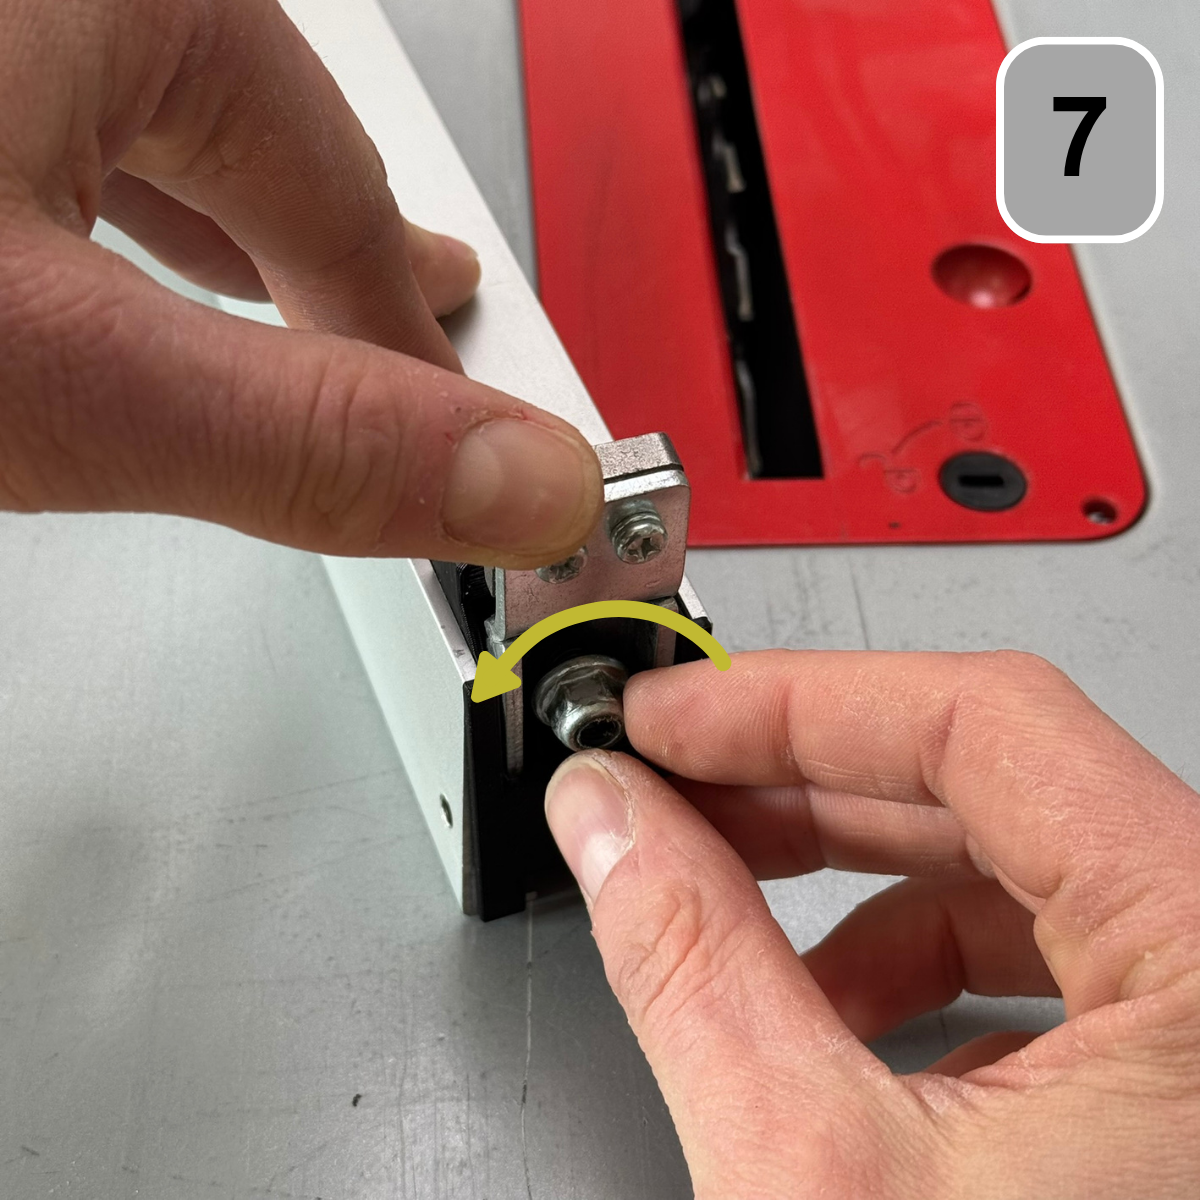
Step 7: Assembling followers
Use the 10mm open-end wrench/socket to loosen the self-locking nut.
to remove it from the back. Apply some pressure to the clamping lever while doing so.
to simplify disassembly.
Step 8: Assembling followers
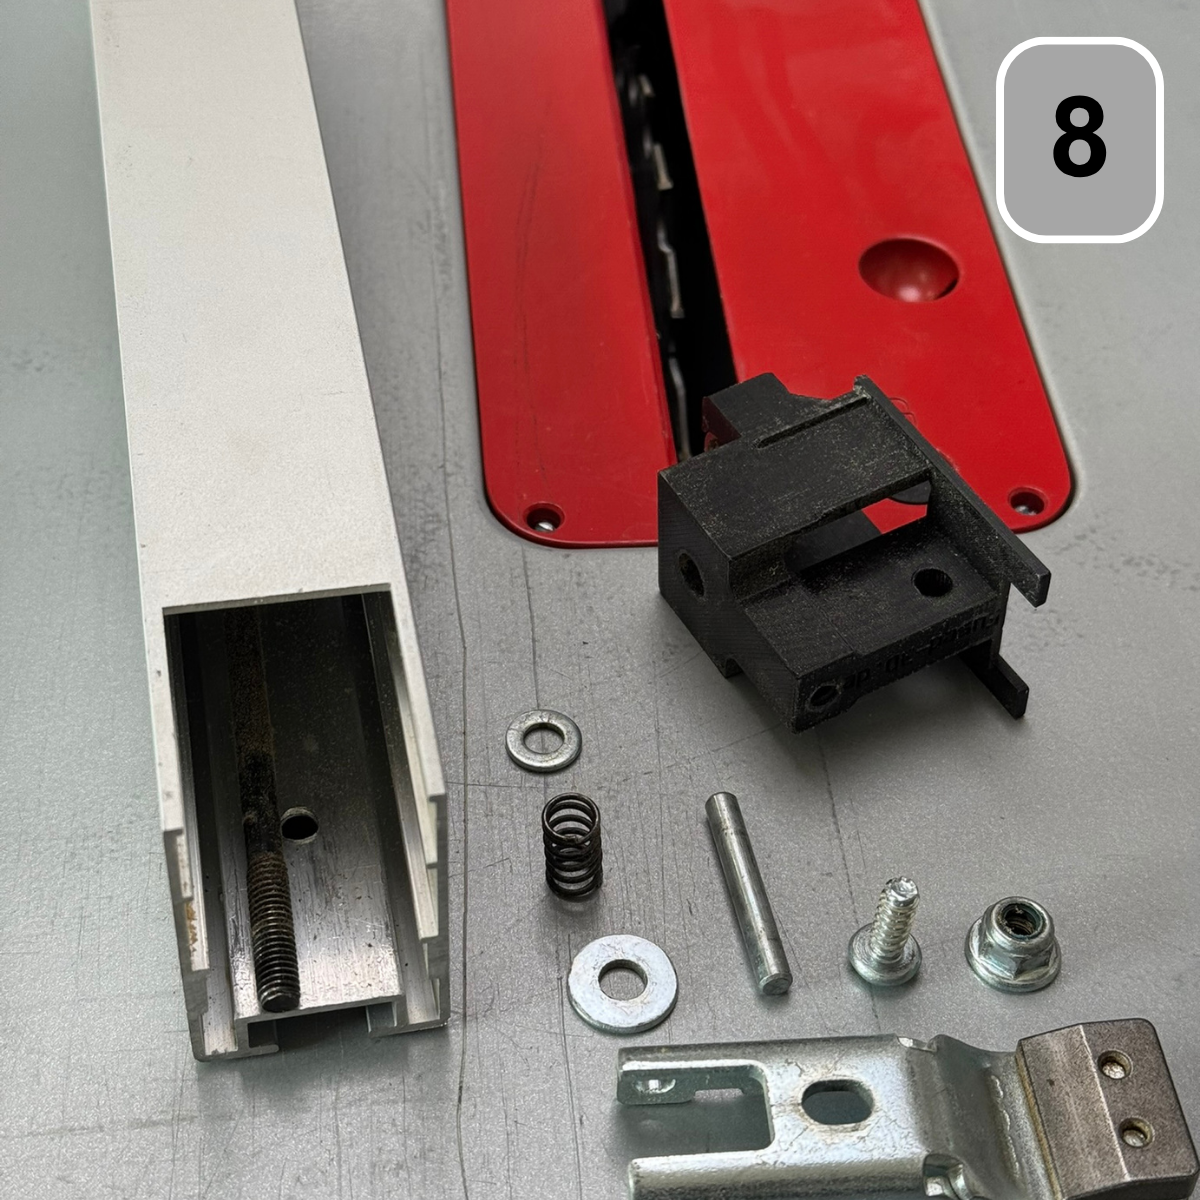
Now remove the follower from the parallel stop. Pay attention when...
Pull out onto the two washers and the spring that is on the
threaded rod seat.
Step 9: Assembling followers
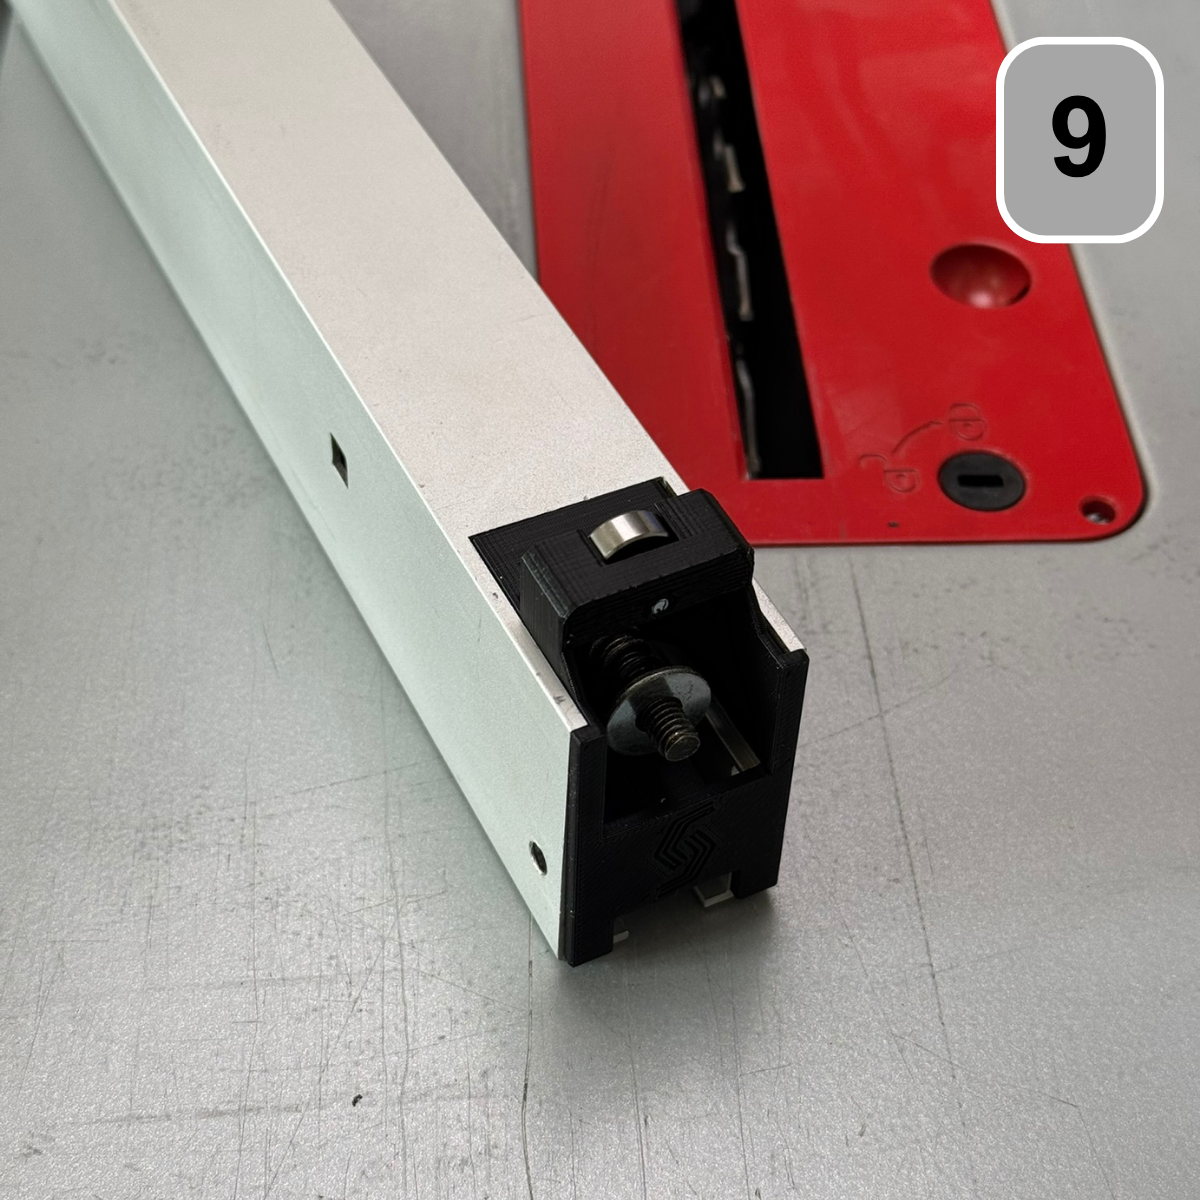
Insert the ball-bearing follower into the parallel fence so that the threaded rod is threaded through the central hole in the follower. Then, place the following items onto the threaded rod in this order:
1. Washer, 2. Spring, 3. Body washer.
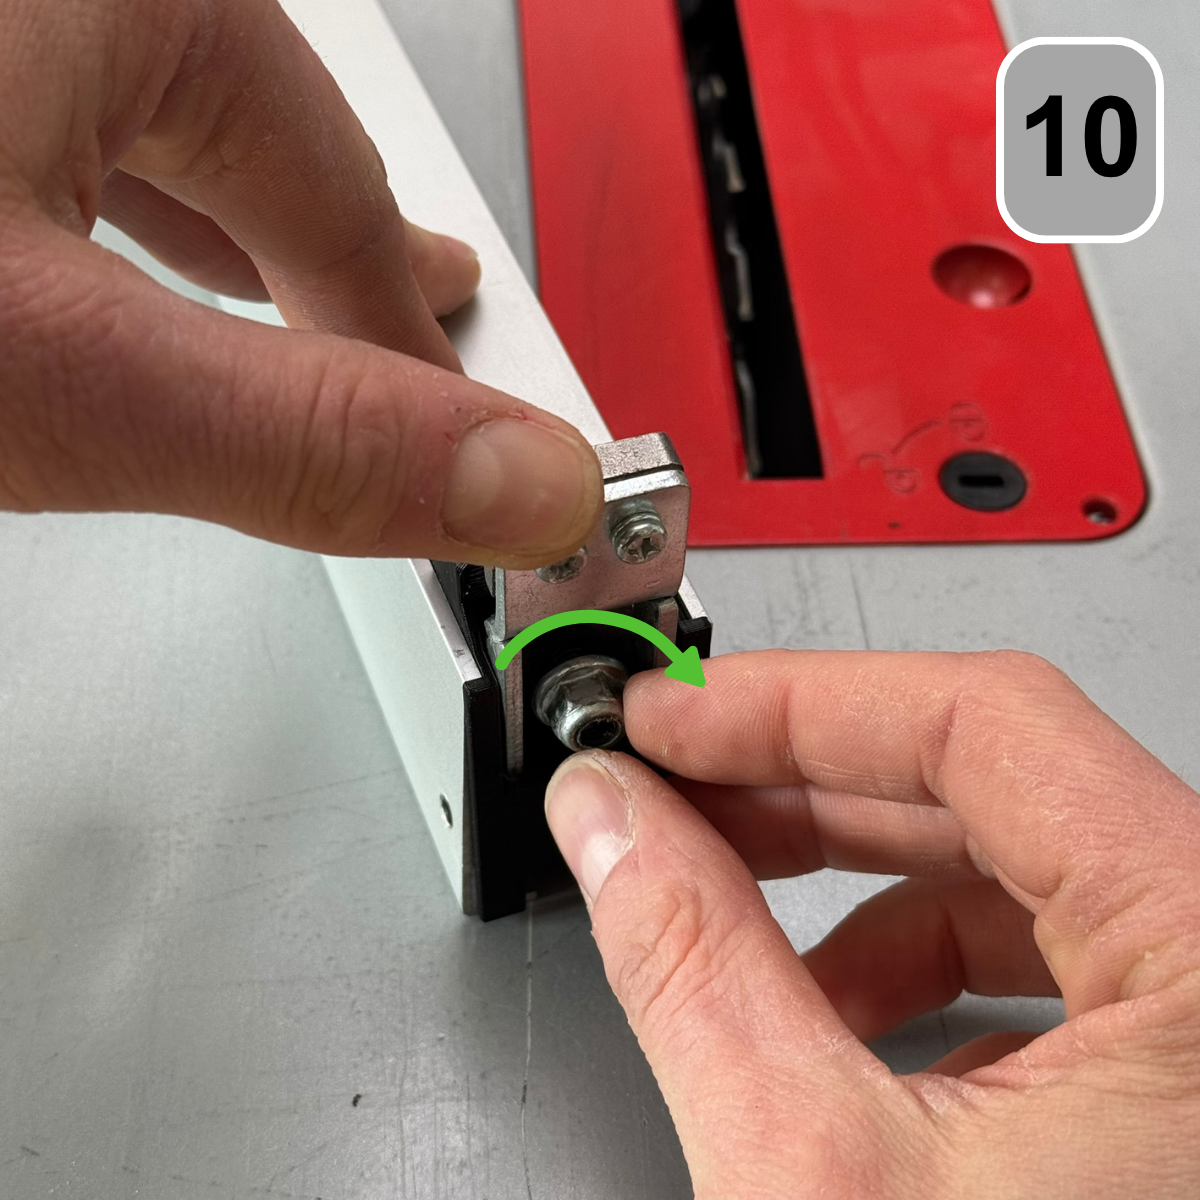
Step 10: Assembly follower
Thread in the clamping lever and screw the self-locking nut onto the threaded rod.
Step 11: Assembling followers
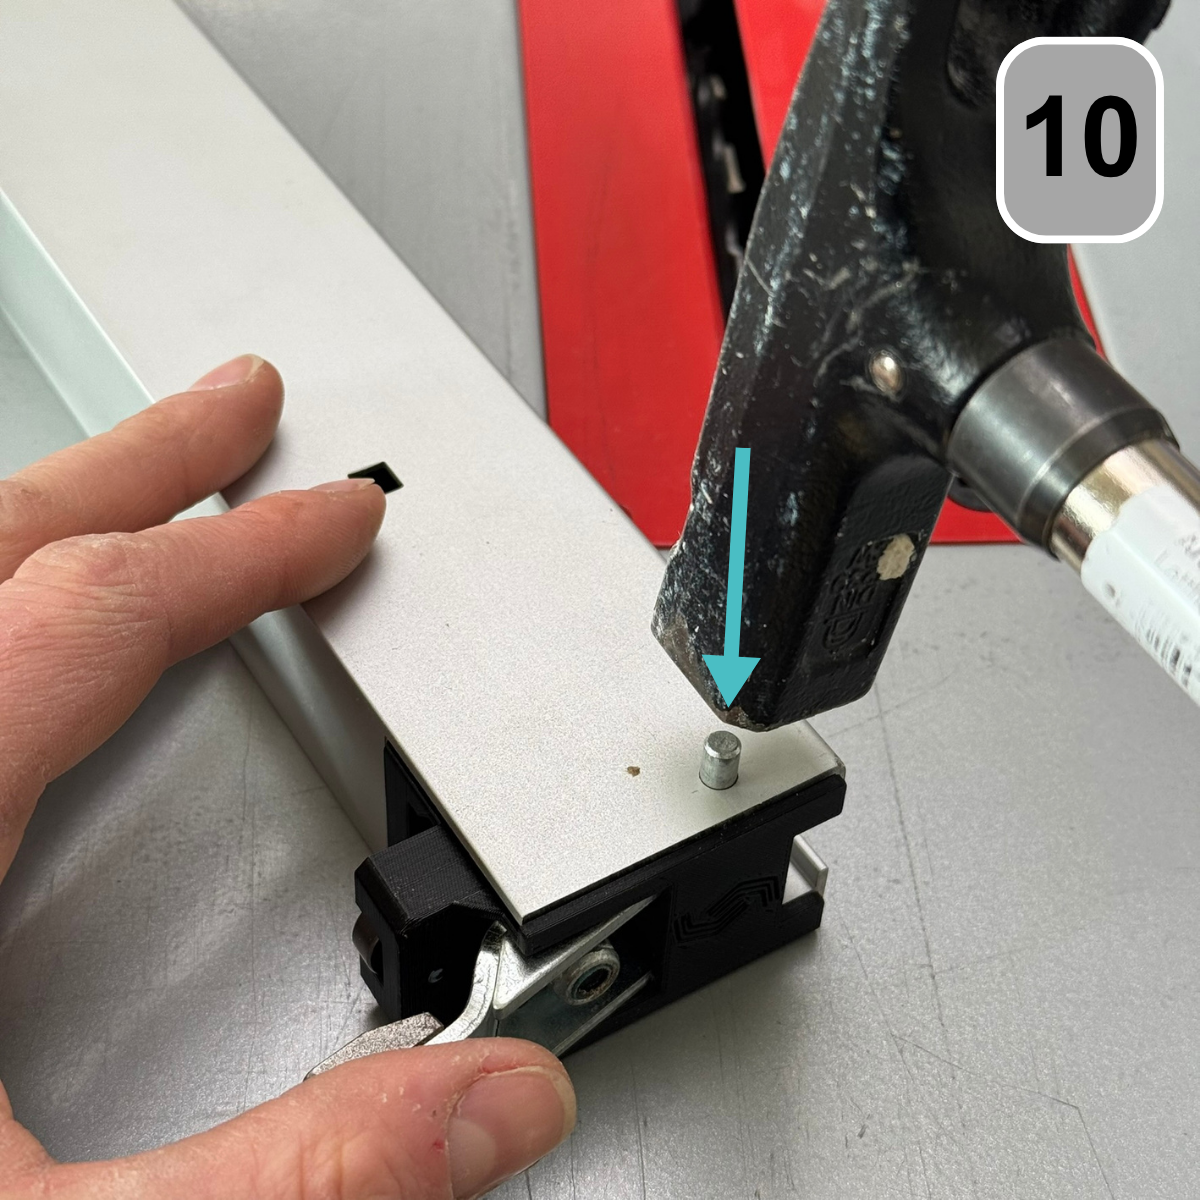
Now drive the axle of the clamping lever back through the clamping lever into the
Set a parallel stop. This must be on both sides of the
Parallel stop.
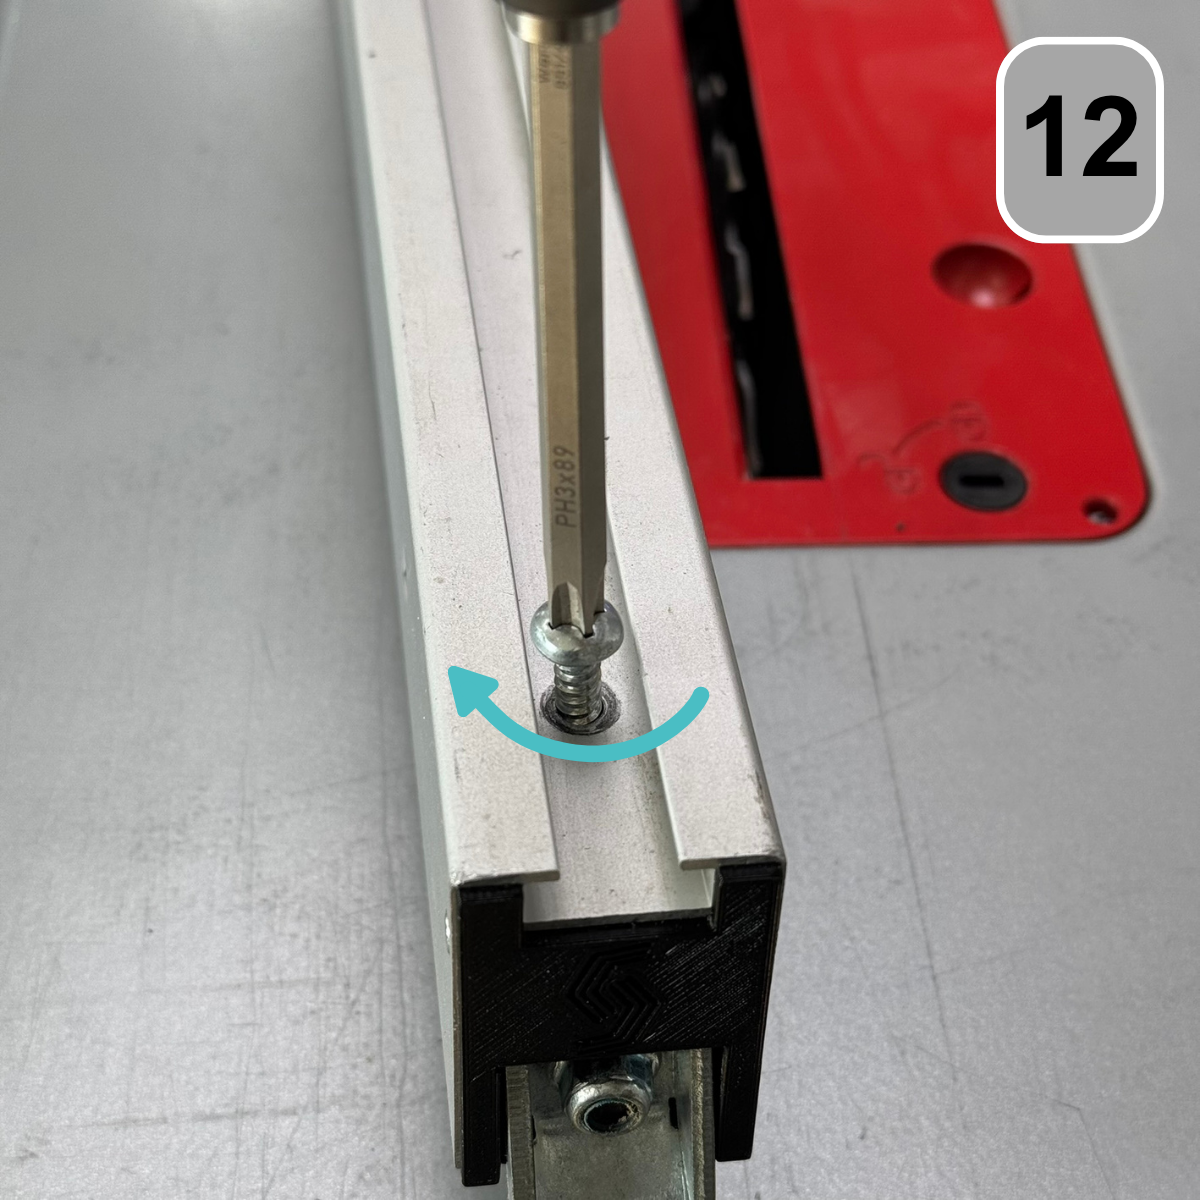
Step 12: Assembly follower
Finally, screw the self-tapping screw into the parallel stop. Use a PH3 screwdriver for this.
Step 13: Clearance adjustment of the roller carriage
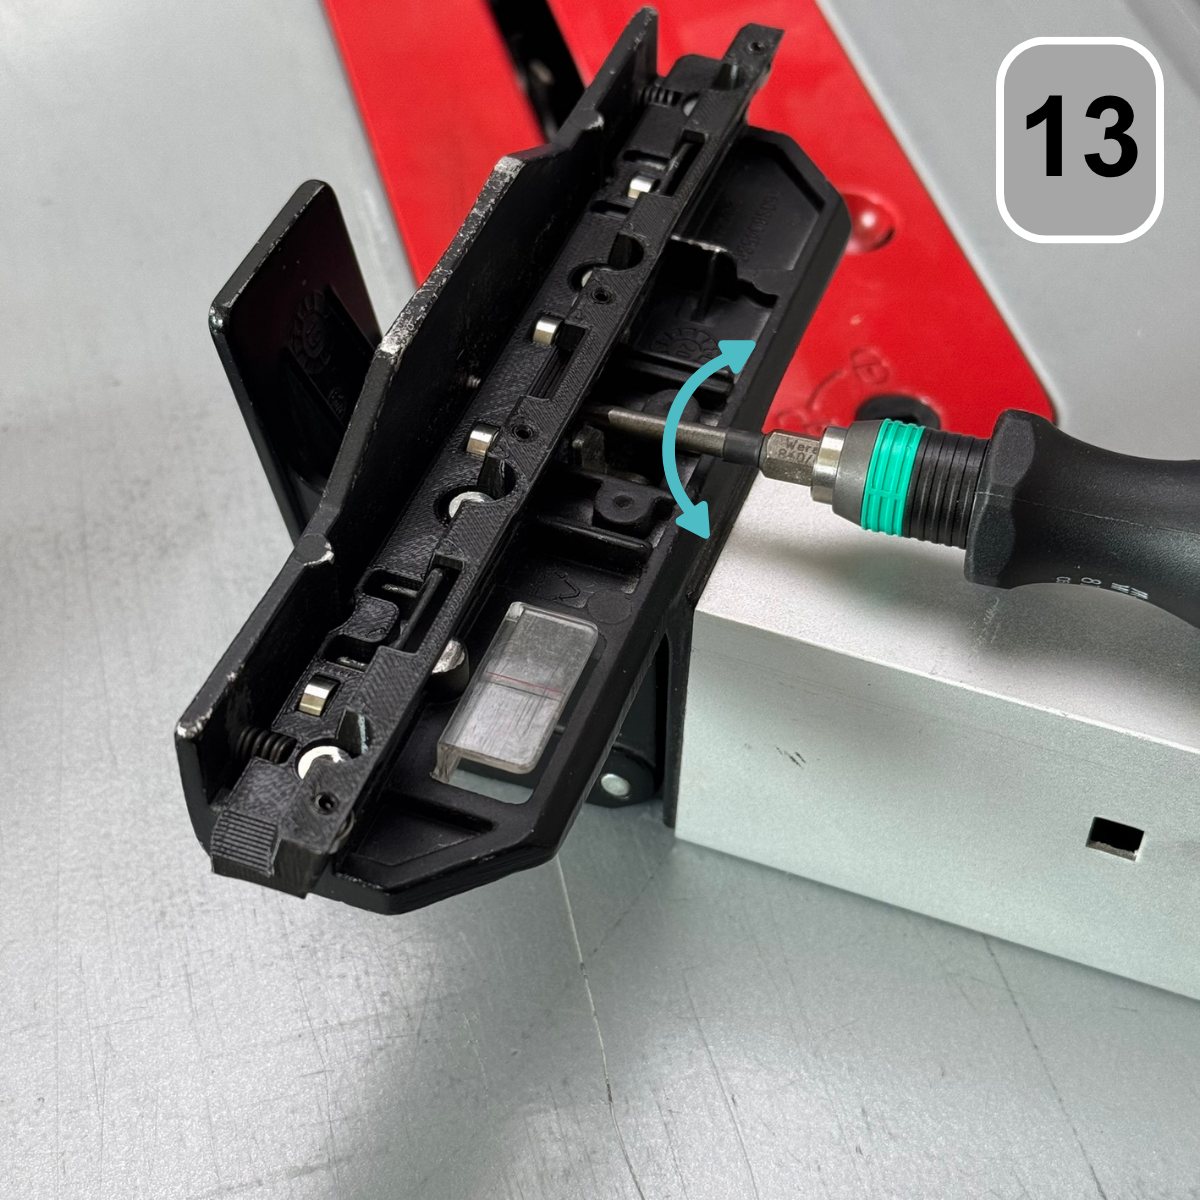
In this step, the play of the roller carriage is adjusted by inserting the parallel stop into the aluminum profile at the front and lowering it at the rear to check if it runs smoothly and without play; for this purpose, the central adjusting screw is carefully turned in or out with a 2.5 mm Allen key until optimal running is achieved – if the stop is too tight or too loose, the two middle screws can be loosened, the profile pressed against the adjusting screw, then fixed again and the fit checked again.
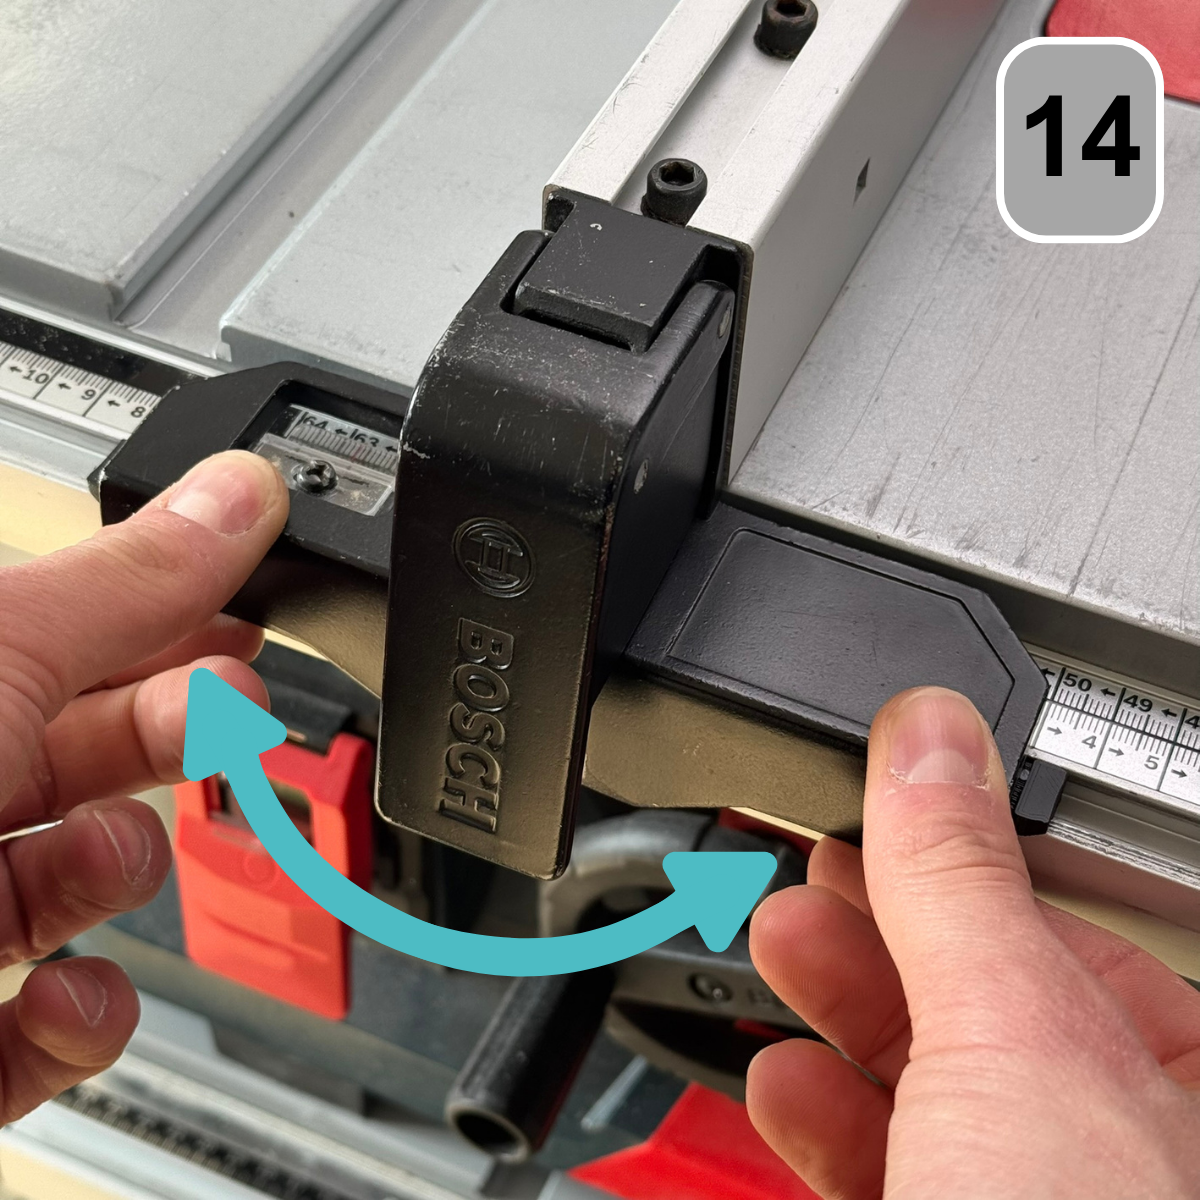
Step 14: Clearance adjustment of the roller carriage
Once the play is correctly adjusted, the self-locking nut on the back can be tightened until the parallel stop is firmly and securely clamped at the back as well.
Step 14: Reward
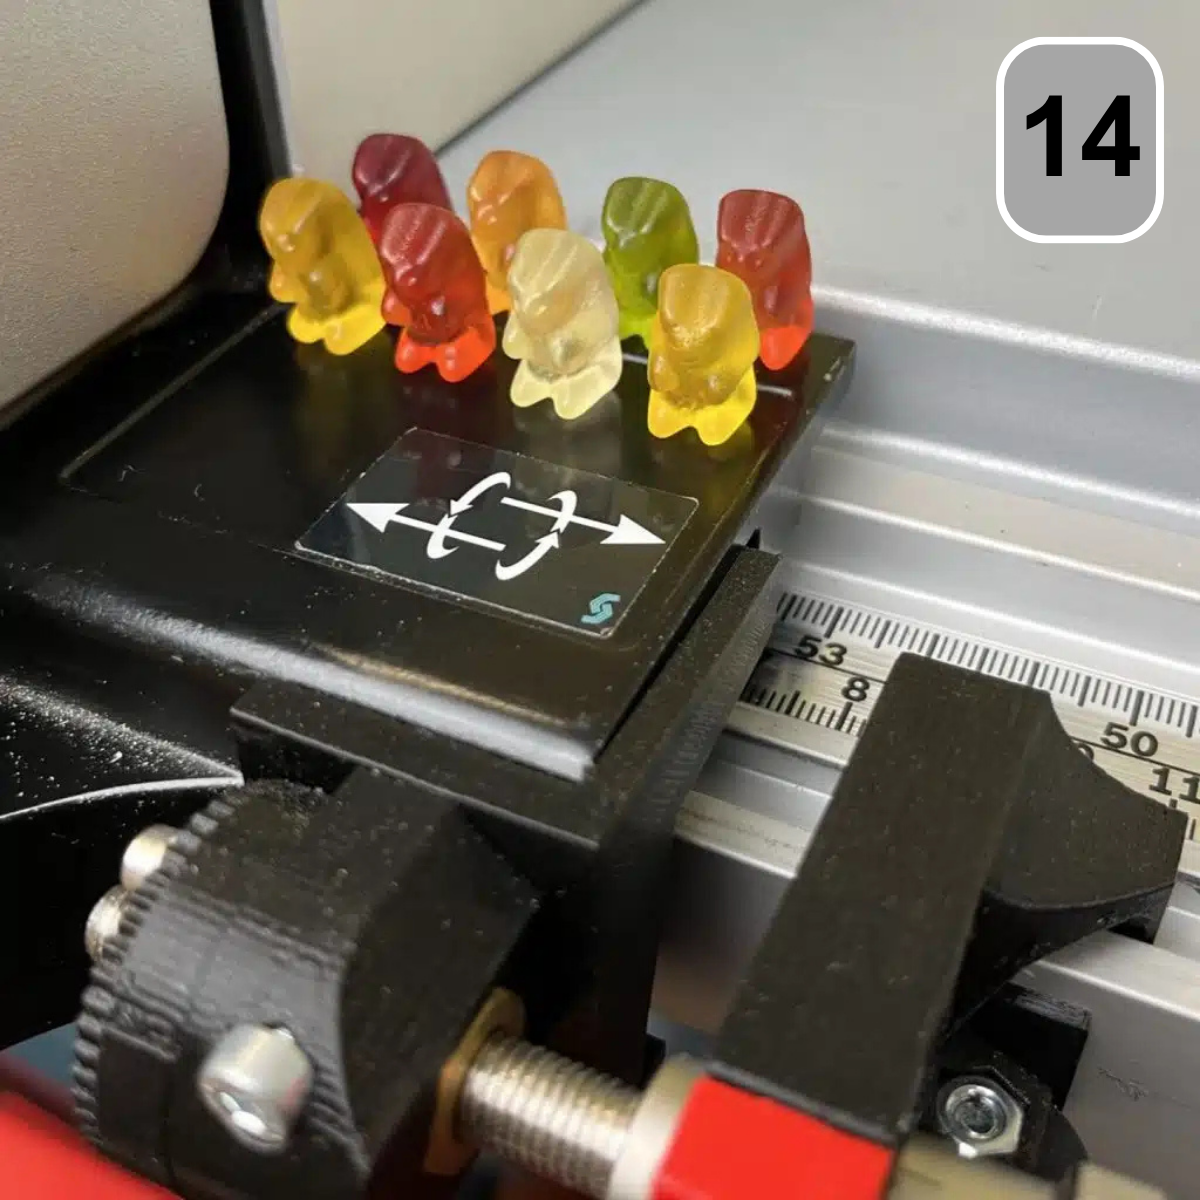
Great job, you did it! Gummy bears are waiting for you as a reward. Enjoy!